If you’re an existing user of Microsoft Dynamics CRM you may find it useful to modify the 3 fields displayed in the global search results. It helps users get access to the information they need quicker, which improves productivity. The screenshot below shows the standard out of the box configuration.
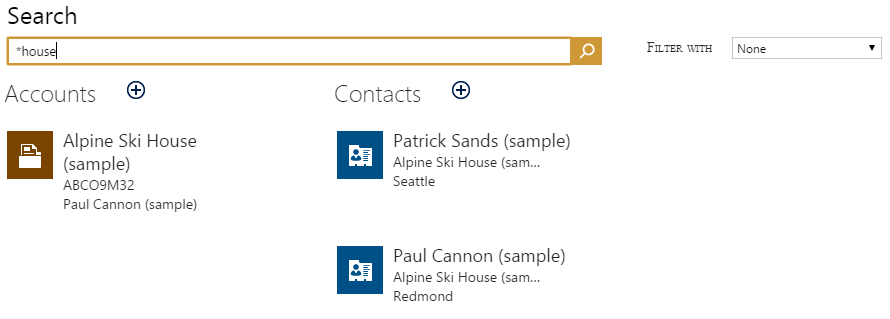
Accounts will display the fields:
- Account Name i.e. Alpine Ski House (sample)
- Account Number i.e. ABCO9M32
- Primary Contact i.e. Paul Cannon (sample)
Contacts will display the fields:
- Full name
- Account name
- City
To modify the fields displayed you need to customise a particular type of view, Quick Find View, for the record type (entity), which for accounts and contacts is called:
- Quick Find Active Accounts
- Quick Find Active Contacts
You will also need to be a member of the System Customiser role. If you work with a Microsoft Dynamics CRM partner then you may want to ask them to make the change for you. Once you publish your changes it will make the change across the whole organisation for all users.
Follow these steps to update the Account record type and to replace Account Number with Business Phone:
1. Navigate to Settings->Customizations and click Customize the system
2. Expand Entities, click Account then click Views
3. Double click Quick Find Active Accounts
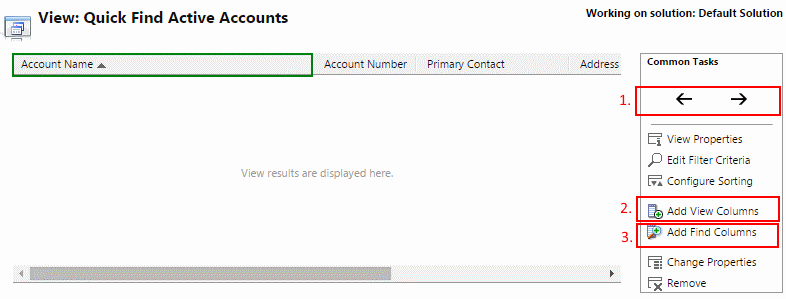
4. To move a column to the left or right click the column header and it will turn green, then use the left or right arrows to re-order it (box 1 in the image). The first 3 columns display in global search results. In our example we’ll move Account Number one place to the right, and then move Main Number in between Account Name and Primary Contact
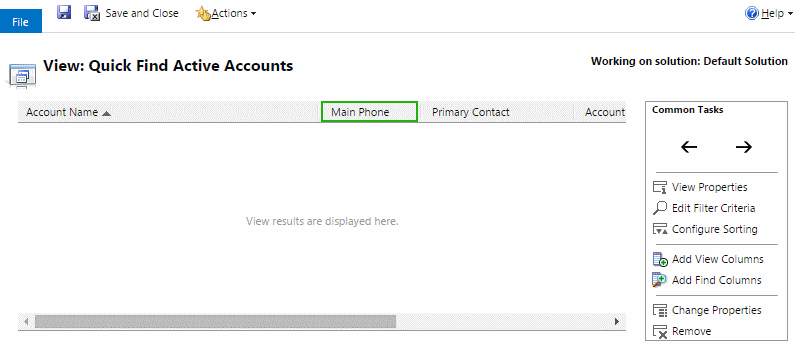
5. To display additional columns in the view, click Add View Columns, check the boxes to the left of the columns you want to include, then click Ok. Tip: New columns will add either to the far right hand side, or to the right of whichever column header you have selected (in green)
6. To change the columns that are used to search for results, click Add Find Columns. For example you may want to also search on City to return all results in a particular city, you would need to check the box next to Address 1: City, and click Ok to include this in the search columns. “Find Columns” do not display in the view’s results
7. Click Save and Close when you have finished
8. Click Publish All Customizations for the changes to take effect across the organisation
9. Re-run your global search and see the results with Main Phone now displayed as the second field
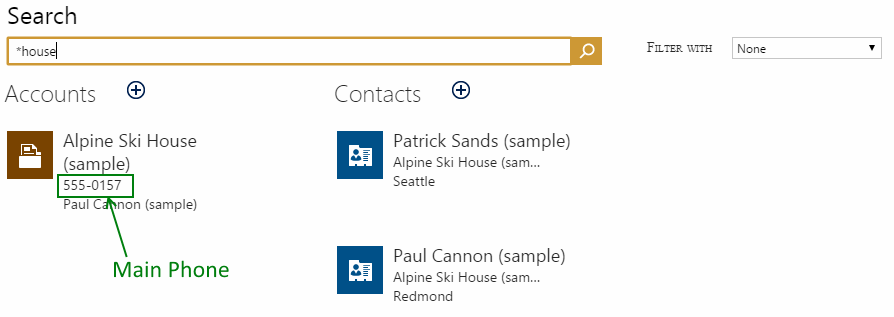
10. Repeat this for the Contacts entity for example, if you want to display Business Phone number in the results
We hope you found this useful and it helps improve your CRM experience!
Being able to quickly and easily tailor Microsoft Dynamics CRM to your unique business needs is one of its core strengths. It makes for a better CRM system and happier CRM users.
Keep an eye on our blog for more advice and how-to’s.